Friday 23 August 2013

Zbrush work in progress - possible Zombie Hunter?

Again working on improving my anatomy work in Zbrush, I've stared this guy. 
I made a base mesh a few weeks back that I'm fairly happy with to start from, so I can dive straight into working on the facial features of the figure. 
As you can see this guy is a fairly standard 'hero' type. 

But if you know me and the stuff I do you'll kinda know that I don't usually do hero's.....freaks and weirdo's are my stock and trade!
So, although he seems a typical genre archetype at the moment, I'm sure I'll mess around enough to make him a certifiable oddball :D
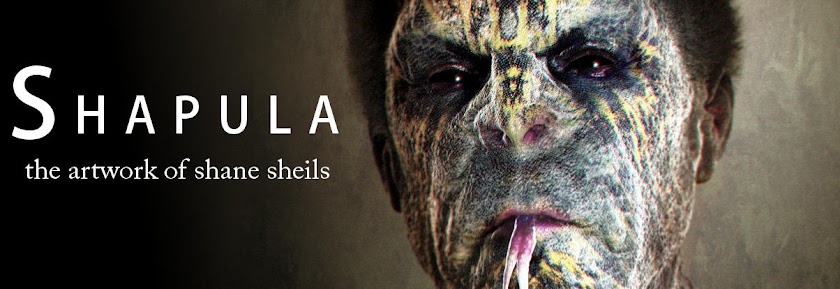
Could you beat him at a staring contest?
click to enlarge
I love this stage of working on a character. The part where you can just toss around ideas and invent a personality or  back-story to the model.  Because of just finishing my previous zombie guy I'm thinking this fella could be a zombie hunter or something like that. Whether he's a part of an elite military unit or just a lone wolf has yet to be decided. Who knows, he could turn into a clown midget for all I know!

If you've got any suggestions/ideas then don't be afraid to share your thoughts.

Thursday 22 August 2013

No Guts No Glory - Zbrush Zombie image

This zombie I made has been sitting around for a few days like a decaying, rotted corpse - so it's about time I upload him for all to see!
In a previous posting I mentioned I wanted the zombie to wear a t-shirt with something written on it. 'No guts no glory' just seemed the perfect fit!
Paint job was mainly done in Zbrush using various BPR renders which I then exported to Gimp. Hair, blood splatter, eyes and smoke was hand painted in Gimp using basic brushes and some custom ones I made.
After I was satisfied with the pic I opened it in IrfanView for final touches such as chromatic abberation, zoom blur, sharpening and noise.
Getting a rabid zombie to sit still for a posed shot like this is not easy!
click to enlarge

A basic clay render screenshot from Zbrush of this charming fella.
click to enlarge

Tuesday 20 August 2013

Zbrush Practice - Head Studies

Some head sculpts I did to try and get better at general  anatomy when working in 3D space. Minimal detailing so that I could try and focus purely on form and shape.
 
I made a simple base mesh (you can see it in a previous posting) and then adjusted the head to suit a variety of facial types.

The eyes look a bit crappy (a ball with an indent in it, basically) and are  mainly  just there so  that  I could get the curvature of the eye correct.
These are base sculpts with no asymmetry...hence the extra freaky startled look on these guys faces!
click to enlarge

Thursday 15 August 2013

Tutorial - Adding torn holes to clothes in Zbrush

My zombie needs clothes badly.
He's wandering around chewing peoples faces off...and all the while naked! he's liable to get arrested for indecent exposure (and cannibalism).

The trouble with zombies (isn't there always such a problem with those crazy guys?)is that they usually don't go around in their Sunday best. Zombies are messy and their clothes get ripped and shredded all the time. 

Recreating this in Zbrush is a slight problem  sometimes because Zbrush doesn't like open meshes - and torn clothing = open mesh.
So it's better to model stuff in it's pristine perfection first and then mess it up with holes and whatnot at the end. 

This is probably one of the simplest tutorials you will ever see for Zbrush.
click to enlarge
The final image in the tut is not the greatest you'll ever see(I spent literally a grand total of 2 minutes on it) but with a tiny bit of extra effort you can get some great looking ripped clothes effects.

For a more complex way to achieve realistic torn cloth/fabric effect in Zbrush you should check out this thread on ZbrushCentral by artist GMP1993. Also read this thread by LVXIFER which develops the idea further. I don't know much about using Micromesh in Zbrush and haven't tried the above tips yet but the results are amazing. (I think this trick only works for internal Zbrush renders using BPR so probably not suited if you want actual geometry that you can take into a different software program.) 

Wednesday 14 August 2013

More Zbrush zombie stuff

You can never have too much zbrush zombie action!
Some screen grabs from Zbrush which I then combine and annotate so that I can figure out exactly what I need to correct/destroy!
click to enlarge
The Matcap used in the above image is available from this download link on my Deviantart page.

Monday 12 August 2013

Zbrush Zombie - new face WIP

I took a break away from my zombie model because I was unhappy with the way he looked (check out my previous blog posts and gaze at horror at the ineptness of my work). 
He had the kind of face only a zombie mother could love..........I wanted to give him the kind of face any mother would love a zombie to have!

So I started a new zbrush project file and began sculpting a 'better' zombie face while looking at lots of excellent zombie  references - particularly the sculptures of pilcrowdesigns (a brilliantly talented artist who you need to check out) 
A screenshot from Zbrush of the newer zombie head with zero detailing.
click to enlarge
Even at this early stage he looks better.
click to enlarge
Sometimes tinkering with a dodgy piece of art can manage to turn it around to looking half decent. But in general it's better to save the tedious time and effort and just start again from scratch with something you actually like.

Thursday 8 August 2013

Free Zbrush Materials download

Download these zbrush materials from my DeviantArt page.


SHAPULA_Light Reactive Sculpting MatCaps

You can download my materials here

These materials are perfect for sculpting in Zbrush because not only do they look good and give a good overall view of your model, but they also react to Zbrush lights - which means more control on the look you want and enjoyable sculpting experience!

There are 3 materials included in the zip file:

  • 'A': a neutral grey material with subtle noise texture and a nice rim light.
  • 'B': a darker grey material with subtle noise and rim light.
  • 'C': simple skin tone-like material with rim light.

To alter your lighting setup all you have to do is move/add or remove any zbrush lights and any change will instantly show up on screen.

Installation:


First download the zip file (approx 4.3mb) and unzip the files to your computer.


To use  these MatCaps, copy/paste each of them to:
C:\Program Files (x86)\Pixologic\ZBrush 4R6\ZMaterials

........or to have them appear whenever you start Zbrush:
C:\Program Files (x86)\Pixologic\ZBrush 4R6\ZStartup\Materials
(*these work in Zbrush4 and all versions upwards).


Happy sculpting!

~Shapula

shapula.deviantart.com
shapula.blogspot.com

Wednesday 7 August 2013

Anatomy Practice

Been practicing anatomy with Zbrush. 
Took my zombie model - which had some dreadful anatomical problems - and went to work on it while looking at anatomical reference images. 
It's clear to see that I still put absolutely no effort into those feet!
Reference is the way to go and I'm hoping to put more effort than I have been into my work as I go along.
See how he skillfully balances an opaque football in mid-air!
Click to enlarge

Friday 2 August 2013

Zbrush Zombie WIP - Another Update!

I decided to chop the right arm off the zombie to make him a bit more zombi-ish. 
below is a pic of the model painted up. I haven't fully decided whether I'll go colour or B&W but it's nice to have the option of both.

Zbrush screengrab of polypainted model.
Click to enlarge
 Having a bit of a problem UV unwrapping the torn shirt in Zbrush: must be something to do with it being a very thin mesh or something.

Closer shot of facial detail.
Click to enlarge
I'm still not exactly happy with his face......it looks good in the image above from an upshot angle though so might stick with it. Who knows? 

Thursday 1 August 2013

Zbrush Zombie WIP update

Here's another update on my zbrush zombie
I couldn't work on him for a couple of days 'cos I got stung by a wasp on the finger I hold my wacom pen with :(

I'm happy with the pose I got using transpose master in Zbrush. I like the idea of this nose-less zombie leaning around as if he's just sniffed some fresh human blood in the air!

Back view of the torn clothing in Zbrush.
click to enlarge

Another Zbrush screengrab.
click to enlarge

This will be the first time I've used Blender (or any outside renderer) to render a Zbrush model. I intend to use some Zbrush matcaps in Blender - which can look pretty good. I'll also get the benefit of Blenders fast renderer (the basic one, not Cycles which I've never really taken to)and use the GLSL shader in the viewport to get the exact lighting setup I want.
The base mesh in Blender for lighting test set-up.
click to enlarge
I actually have the character poly-painted/textured but I kinda prefer the untextured look at the moment. I want to work on form and silhouette as well as some good high-contrast lighting, and a lot of the time a painted model can hide some serious design flaws....which I hope to avoid!